Get in Touch with Guanma

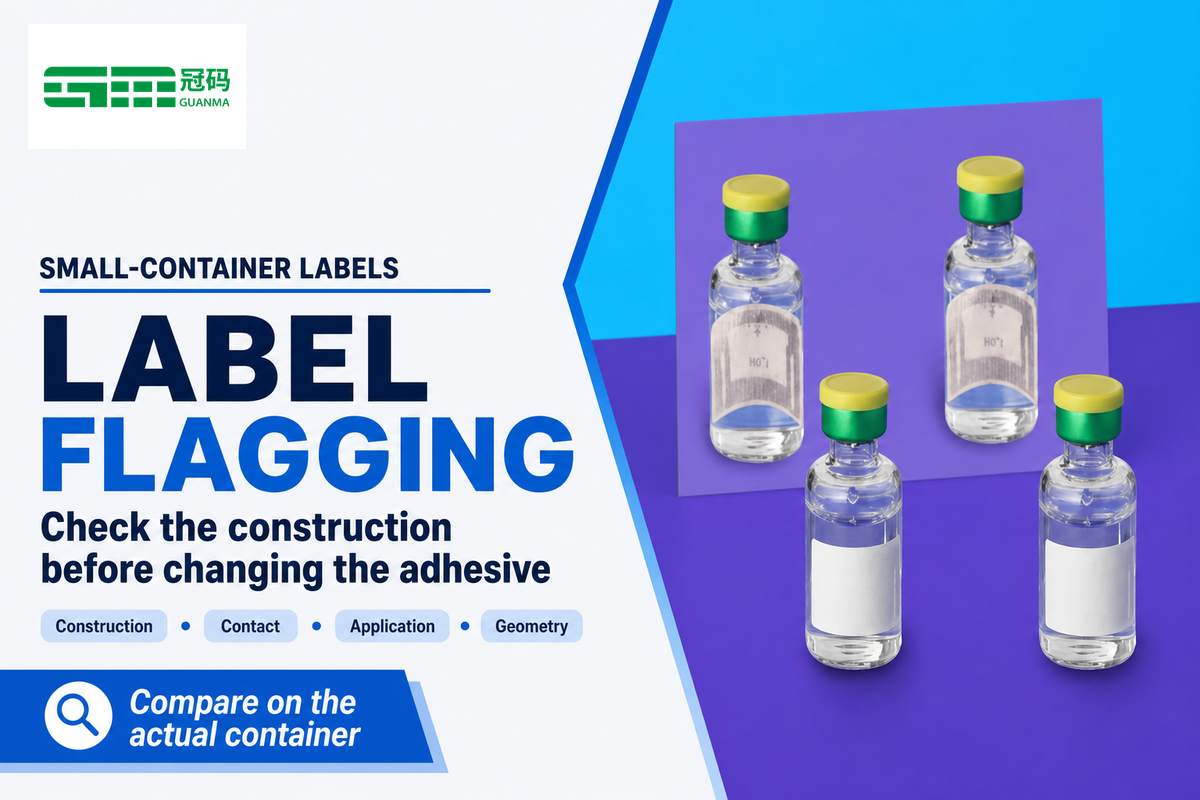
A label can look flat on the roll and lift after wrapping a small bottle. Pressing the edge down may cover the problem without explaining its cause. Before ordering a stronger adhesive, check whether the finished label fits the curve and whether production gives it consistent contact.
Label flagging is unwanted lifting of an applied label edge. For small containers, review finished construction, adhesive suitability, application conditions and geometry. Compare samples on the actual container; a flat peel test alone doesn’t determine curved performance.
- A higher tack or peel number does not automatically identify the better small-bottle label.
- Print, coatings and laminates should be included in the test; raw face stock should be considered part of the construction.
- A proposed screening comparison may help focus the study, but doesn’t predict service life.
What Label Flagging Looks Like on a Small Container
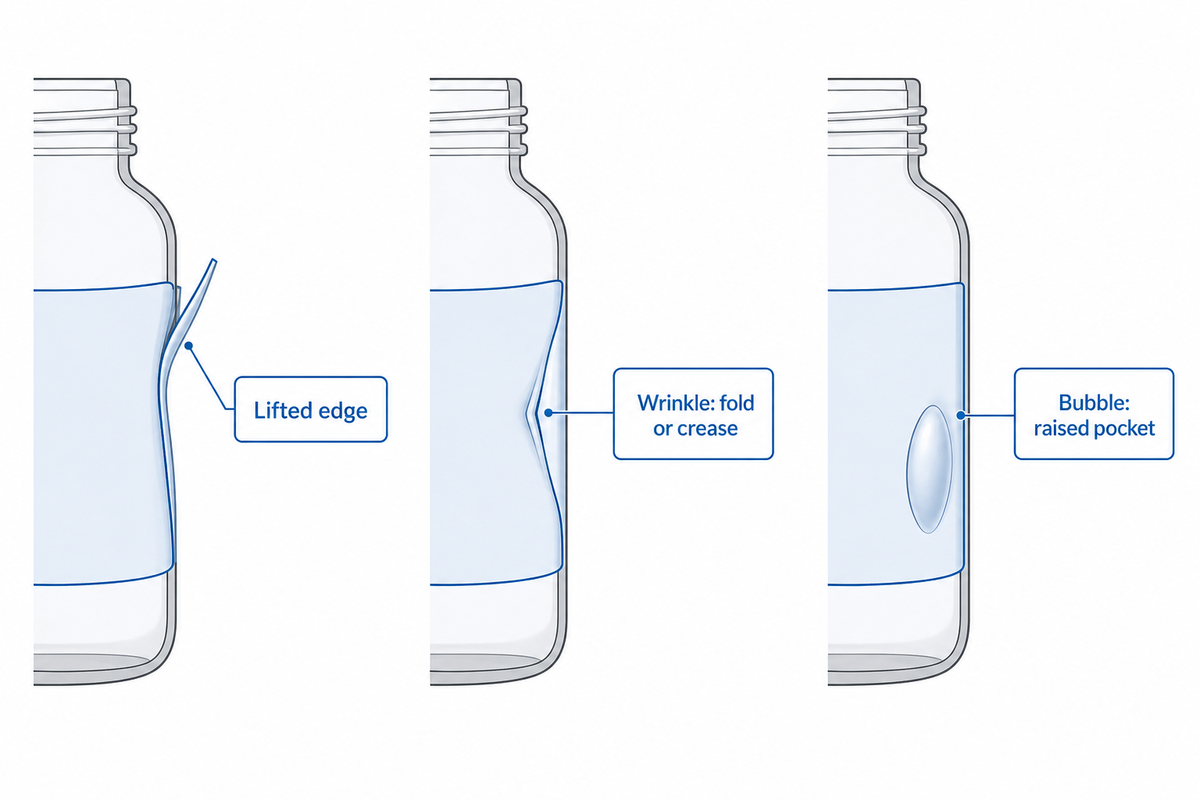
Label flagging is lifting of an edge instead of remaining in contact. The lifting can occur at a corner or the end of a wrap. Record the location and timing before choosing a remedy: different causes of label failure can produce similar-looking edges. Similar edges may occur due to different causes.
A wrinkle is a fold or crease; a bubble is a raised pocket beneath the label. Those defects can occur with flagging, but aren’t interchangeable descriptions. Describe what you see along the edge of labels, including whether the rest of the adhesive remains attached. A photo from the top, alone, can hide the gap.
For example, imagine a skincare packer finding lifted corners only on its narrow travel bottle. The same roll appears satisfactory on a wider jar. That observation would suggest a geometry check is in order; however, it doesn’t prove curvature is the only cause: the two packs may have different surfaces or may have passed through different labeling stations. Keep a failed bottle, an apparently satisfactory bottle and the roll identification together. Is the lift present immediately, after storage, or only after handling? This is an illustrative diagnostic scenario, not a reported Guanma production case.
Start with a description, not a conclusion. “Labels fail after filling” indicates a useful point of departure. “The adhesive is weak” assumes the answer before the container surface, application and finished construction have been compared.
Why Diameter and the Finished Label Construction Matter
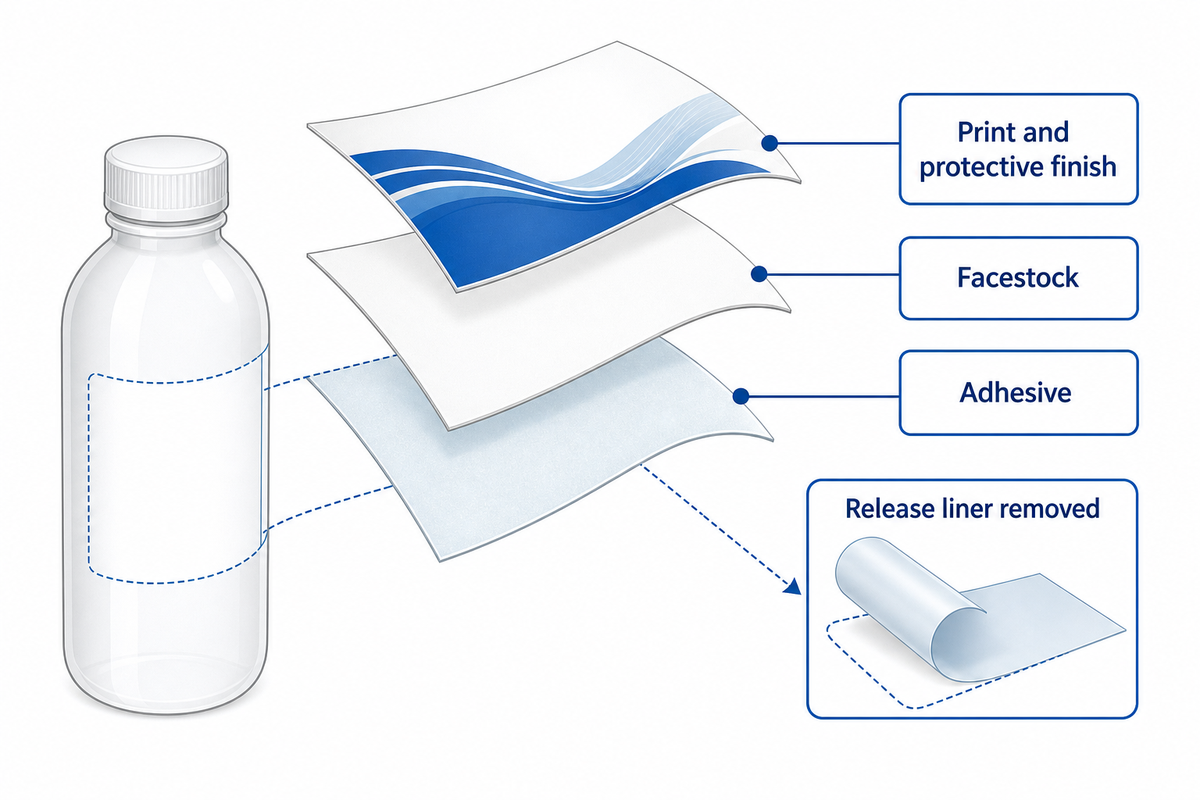
A small diameter container demands that the label material remain bent after application. The facestock, print and protective finish influence the response of that applied construction. Check the diameter at the actual label panel, together with taper and shoulders, rather than using the bottle’s largest diameter as the only specification.
The release liner supports the label before it’s dispensed, and is removed during application. While this can affect feeding, it isn’t part of the applied stack; therefore, a description of the release liner as a “PET liner” tells you very little about the face stock. Refer to separate specifications for the facestock and label liner.
Two polyester labels of different thickness and finish can also exist. A laminate that protects label printing also changes the construction being bent around the bottle. For the background of the material, see the PET face-film selection guide. For this edge lift investigation, use the actual converted sample.
In Labels & Labeling’s application guidance, interaction of the substrate and adhesive with the face material and application is discussed. This is important when a supplier provides a substitute. If there’s a change in both the face material and adhesive, a better result may indicate a better combination.
Record face-film thickness in µm separately from liner thickness, plus the varnish or laminate identification. A raw-stock approval doesn’t cover an unrecorded finishing change.
Separate Material Stress from Adhesion and Application Faults
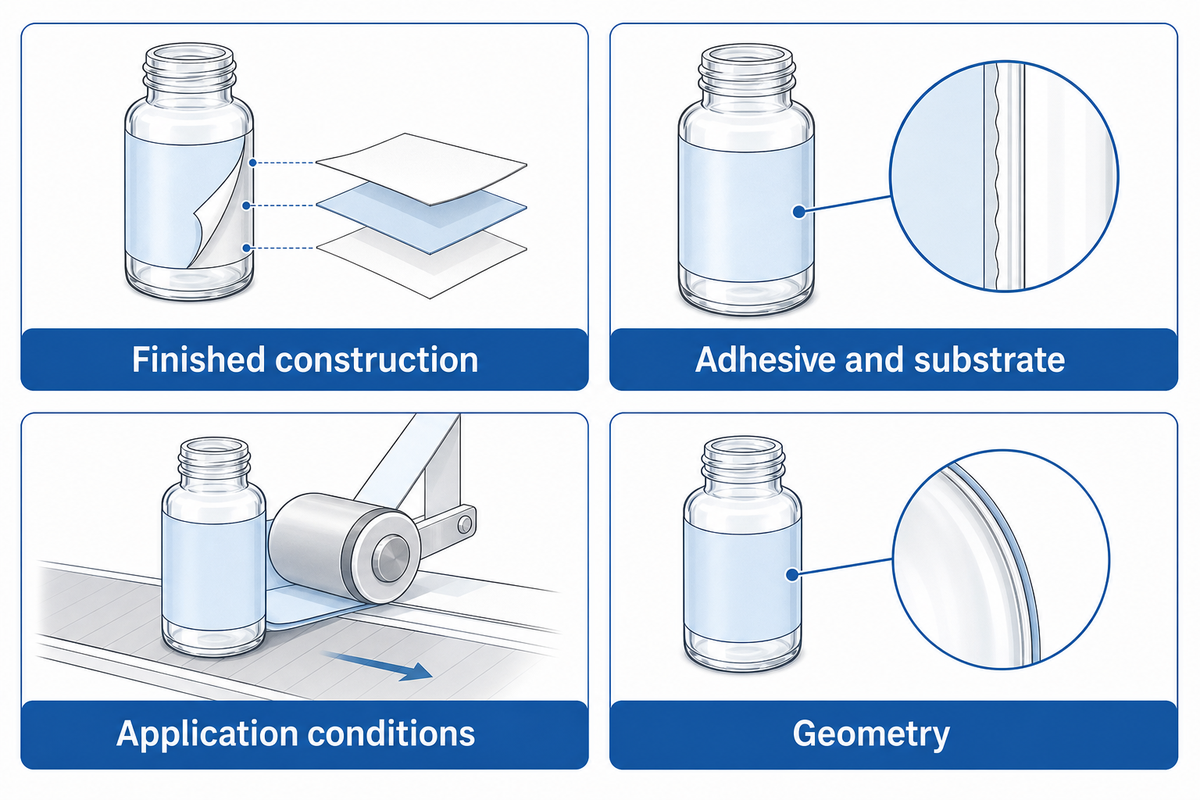
Divide the investigation into finished construction, adhesive and substrate, application conditions and geometry. Use the present production label as control. Where possible, change one known variable at a time; when a supplier can only offer a different combination, record every changed component before interpreting the outcome.
Close contact is critical because adhesive must wet the surface. The 2023 review by Fitzgerald and colleagues explains wetting and viscoelastic behavior of adhesives. Biomedical applications of adhesives don’t set bottle-label limits, but contact and material stiffness along with contamination also are important.
The 4-Variable Flagging Trial Matrix turns these observations into comparable data. Use this matrix to pick the next variable you’ll test. Don’t determine the cause of the effect from the matrix alone.
| Variable | Observation | Useful comparison | Interpretation limit |
|---|---|---|---|
| Finished construction | Only a laminated version lifts | Compare identified finished constructions on the same container | Printing or adhesive may also differ |
| Finished construction | A thinner sample appears better | Retain print, finish and adhesive details for both samples | Thickness alone does not describe stiffness |
| Adhesive and substrate | One container material fails | Compare adhesive options intended for that actual surface | A generic plastic name does not identify surface treatment |
| Adhesive and substrate | Lifting follows filling or washing | Compare representative surfaces with the approved preparation process | Cleaning must not damage the pack or change its surface |
| Application conditions | Hand samples hold; line samples lift | Check contact at the edge during production application | Hand application is not production validation |
| Application conditions | Failure changes with temperature | Record container, roll and room conditions for each group | Storage history and condensation may also change |
| Geometry | Only the narrow format lifts | Use each actual container format with identified samples | Different formats may also have different surfaces |
| Geometry | Lift begins at the overlap | Check adhesive contact with the printed or coated face | Overlap is a different bonding interface |
| Geometry | An edge starts partly detached | Record initial contact, placement and any pre-existing gap | Later lift cannot be compared fairly with a fully contacted sample |
Check whether bottles are damp, dirty or greasy and establish the preparation process before comparing labels. Prepare the surface using a method accepted by the container and label suppliers; don’t use an unapproved solvent to clean up the sample. Contamination and uneven surfaces can cause problems that a stock substitution merely conceals.
An appropriate controlled comparison will narrow the next question. It can’t prove a unique cause when several conditions change together. Keep failed samples as well as successful ones, so the supplier can examine where separation occurred.
Thin Facestock, Conformable Film or Different Adhesive?
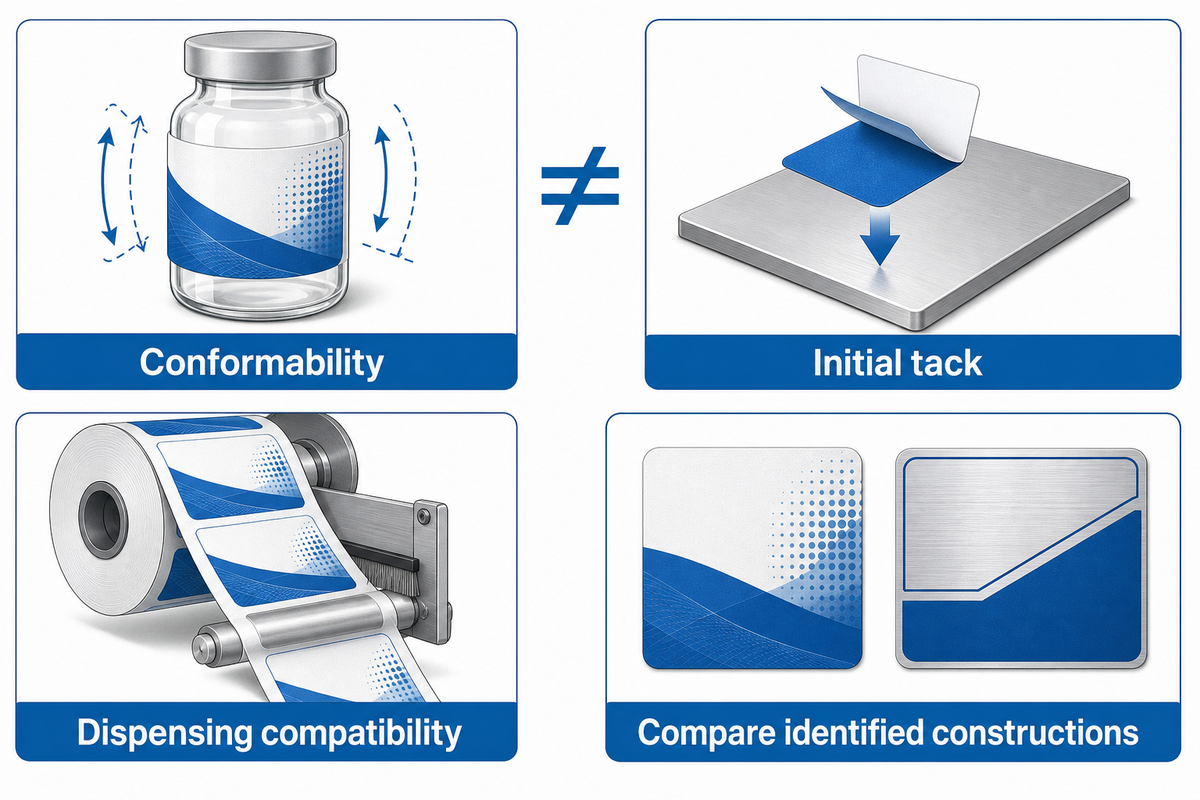
The optimal first material comparison relies on the observed failure and options offered by the supplier. Request identified, more conformable finished labels and, where available, an adhesive alternative on comparable face material instead of assuming that thinner film, paper or a stronger adhesive is better.
UPM’s published small-diameter guidance includes special thin papers as well as flexible films. This information is a useful correction for “film always solves flagging,” not a recommendation for every paper grade. The facestock you’re using still has to print, dispense, and tolerate the product’s conditions.
Check what an adhesive number measures. ASTM D6195-22, section 5.2, states the backing influences loop-tack results: stiffer backing generally produces higher results for the same adhesive. Therefore, a higher initial tack does not independently establish better conformability or resistance to flagging.
Consider an illustrative converter trial in which a flexible sample holds on a narrow bottle but releases poorly at the existing dispensing setup. Approving it from the hand-applied bottle alone would miss a production constraint. In this case, retain the evidently successful construction for further examination and have the converter evaluate release behavior and machine compatibility. In the next trial, should a different liner resolve the feed issue, preserve that identity: the label may be unchanged, but the route by which it reaches the bottle is certainly different. In both cases, the purchaser is interested in satisfying application and hold.
What Type of Label Works Best on Curved and Textured Surfaces?
A label suited to a curved surface must conform to the shape while maintaining adhesive contact. Texture adds a separate contact challenge, meaning there’s no one film family that answers both questions. Be specific and describe the squeezable or rigid container, its finish, and other constructions built to interface with that surface.
When using a plastic container, know the type of plastic and any coating or treatment; glass bottles also need their surface conditions checked. A repositionable adhesive chosen for easy removal answers a different need from permanent adhesion. General PET and BOPP material differences can help shortlist candidates, but neither polymer name replaces an actual-container comparison.
Specify the trade-off. A flexible face stock that won’t feed reliably through the label printer or applicator isn’t a production-ready replacement.
Check the Label Design and Application Process
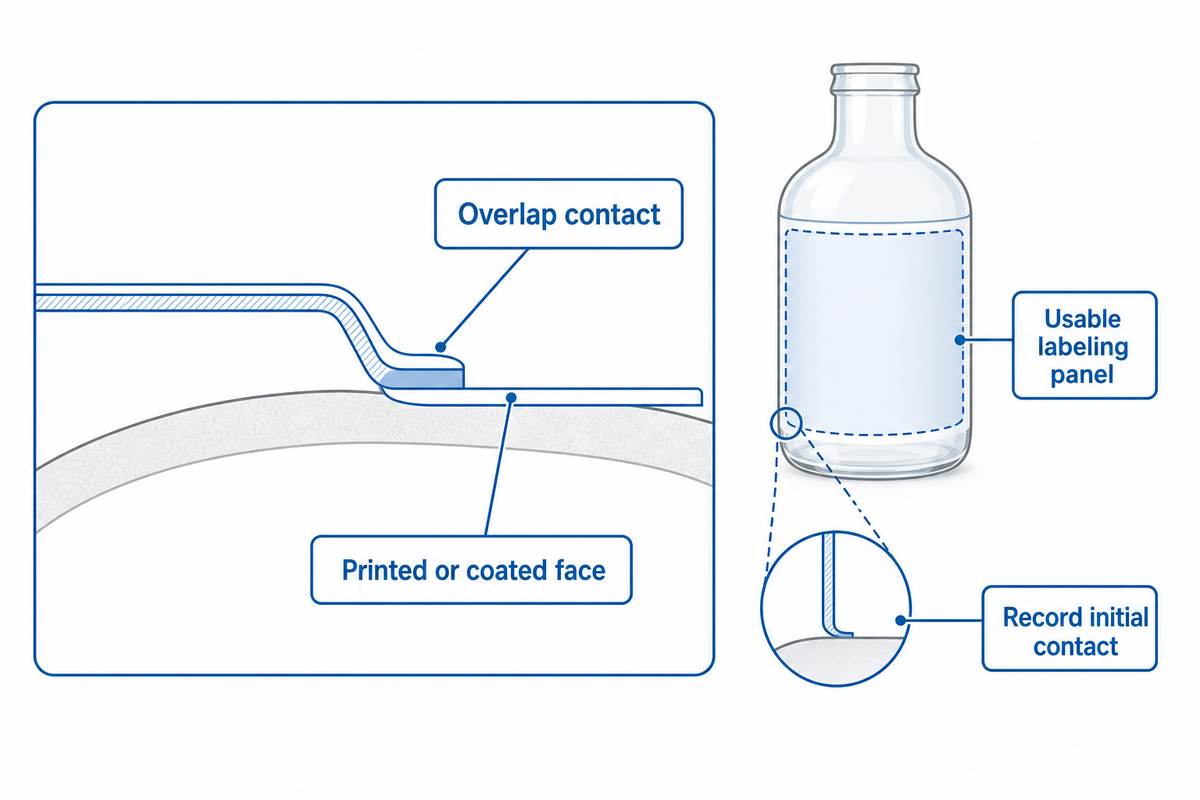
Compare the right size and shape against the useable labeling panel before changing stock. A label is too large if its intended position forces it onto an unsuitable shoulder, taper or feature. Choosing the right shape for a curved surface requires the actual container drawing and a placement trial and not just the artwork size.
The label size may appear acceptable on a flat proof, but be large for your container at the specified position. Check the surface of your container around seams and transitions. A curved or irregular container may need a different outline or placement to provide consistent contact.
Overlap changes the contact surface: the ending adhesive touches the first label’s printed or coated face. The combination, including the production varnish, should be tested. Extending the wrap is not a universal remedy, and exposed or poorly contacted edges can still form along the edge of an overlap.
Are you applying labels by hand or by machine?
Hand and machine application should be analyzed separately, as the contact and placement can be different. A hand-applied sample helps screen materials, while production labeling equipment shows whether the chosen construction dispenses and reaches the container consistently. Record which method produced every sample, including any edge that was pressed down again.
At the labeling station, check actual label applicator settings with the equipment supplier. Don’t stretch the label or touch the adhesive with bare hands. Check if the label peels away from the liner consistently and if a torn release liner interrupts feeding. Assess the performance of automatic label application at the desired operating conditions, and not only during a slow demonstration of setting it up.
Don’t alter the evidence before documenting it. Photograph the edge as it leaves the labeling machine. A second hand press can change the sample and mask common label application problems. For liner-specific feeding decisions use the release-liner matching guide.
Run a Controlled Mandrel Trial on the Actual Container
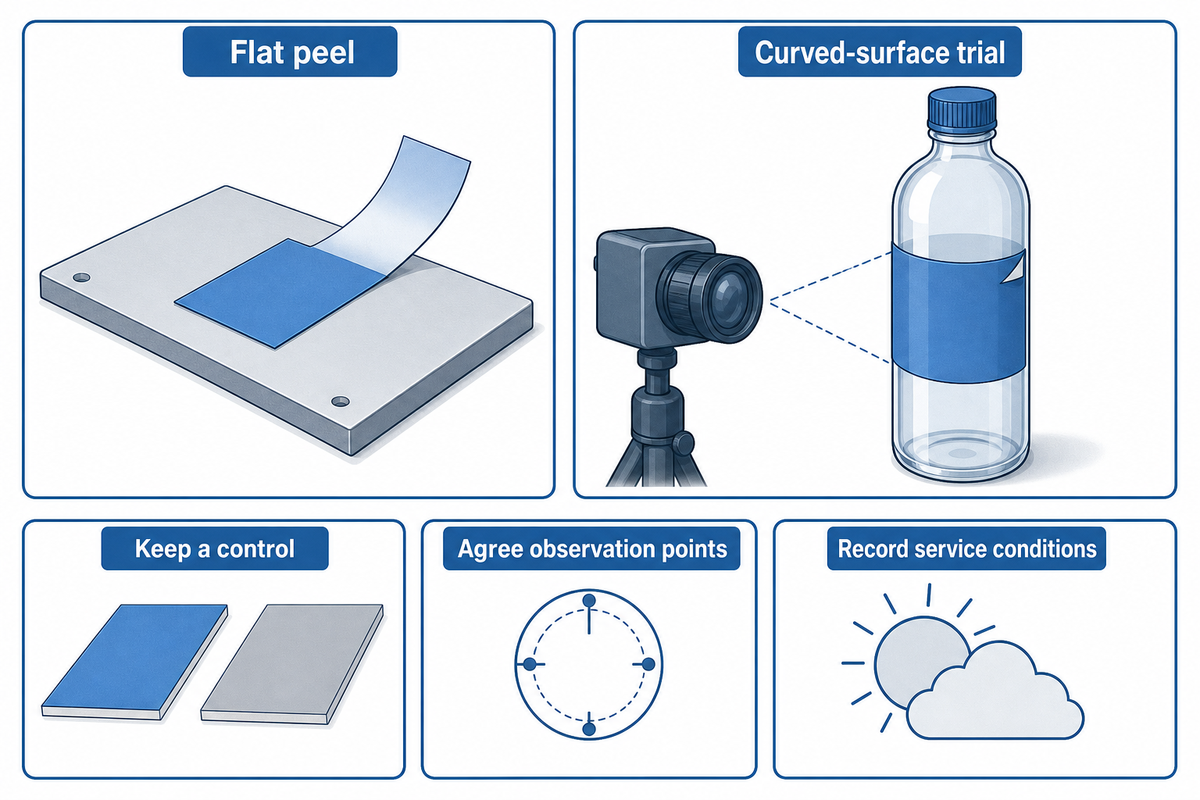
A curved-surface trial evaluates whether the finished label stays attached under specified conditions on the intended container. The trial should maintain current-stock control and document the first contact, observation times, and service conditions. Flat peel results remain useful supporting data, but they cannot independently establish performance on that curved package.
“there is usually no direct relationship between peel adhesion and any functional requirement.”
FINAT’s published method index distinguishes FTM 24 mandrel hold from peel tests. FTM 1 specifies 180° peel at 300 mm/min; FTM 2 specifies 90° peel at 300 mm/min. Those descriptors identify different measurements. They don’t supply a universal label flagging limit, and the public index doesn’t reproduce the complete FTM 24 procedure.
- Define the comparison. Identify the finished construction and the container format and explain the variable that’s being altered from the baseline. Maintain the original construction as the control.
- Record application conditions. Include roll storage, surface preparation, temperature, humidity and application method. Store your labels as instructed by the supplier.
- Agree on the observation points.Allow enough time to examine delayed changes under the intended conditions. There’s no one time for your label adhesive to ensure there’s suitable contact across all constructions.
- Examine the relevant service conditions, particularly if they include repeated handling, squeezing or exposure to moisture. Don’t mistake unrelated extreme temperatures for the actual service conditions.
A 2006 NIST study measured temperature-dependent peel behavior in pressure-sensitive tape. While this study isn’t a ‘bottle-label’ qualification, it illustrates the importance of providing conditions when comparing adhesive results. Record residue, or face-material tearing, as well as edge lift.
In an illustrative receiving inspection, a buyer photographs every sample immediately after application and notices that one group already has a partly unattached corner. Counting its later lift against fully contacted samples would confuse an application difference with material performance. Maintain that observation, and investigate the root cause. As a part of that investigation, prepare a comparable sample group. Agree in advance whether an edge gap, barcode obstruction or loss of contact would reject the sample. Keep lift height and lifted edge length as separate measurements in mm; the same number can describe very different defects.
This is a proposed screening approach, not a reproduction of FTM 24. It does not establish a unique root cause, service life or regulatory compliance. Use an agreed qualification plan for approval; the site’s sample-batch acceptance guidance covers the broader handover.
Send a Sample Brief That a Supplier Can Use
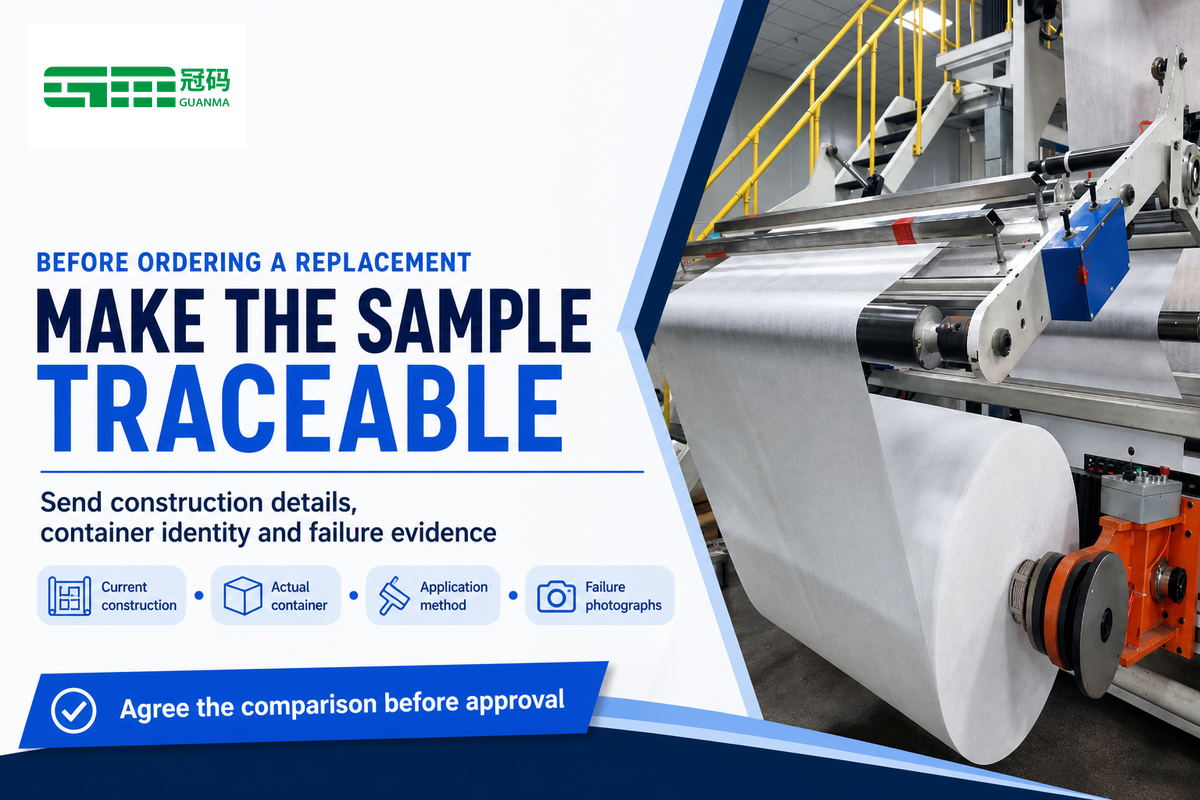
A valuable vendor questionnaire focuses on the current construction, actual container and failure conditions before seeking alternatives. Send failed samples, as well as apparently good samples, if available, along with photographs, and traceable roll details. Describe which properties may change and which production constraints the replacement must satisfy, including print, dispensing and handling.
| Record field | What to supply | Why it matters |
|---|---|---|
| Container identity | Supplier, material, grade and batch if available | Separates actual substrates from generic names |
| Labeling panel | Diameter and usable height in mm; drawing or photos | Identifies the area that must accept the label |
| Current construction | Face material, adhesive, finish and product codes | Creates an identifiable control |
| Separate thicknesses | Facestock and liner thickness in µm | Prevents confusing support liner with applied film |
| Label geometry | Length, width, corner shape and overlap or gap in mm | Records the intended contact arrangement |
| Surface condition | Coating, treatment, filling and preparation history | Identifies contact variables |
| Application | Hand or machine; operating settings and contact method | Separates sample preparation from production behavior |
| Environment | Application/storage temperature in °C and humidity history | Makes comparisons interpretable |
| Failure observations | Time, photographs, lift height and lifted length in mm | Distinguishes onset from severity |
| Service and acceptance | Handling exposures, agreed endpoints and pass criteria | Prevents changing approval rules after seeing results |
Illustrative entry, not test data: “Current construction A; candidate B changes face material and adhesive; machine-applied on the same container batch; observation schedule to be agreed.” This entry makes the remaining uncertainty visible. It can’t isolate the adhesive contribution because two components changed. Add measured dimensions and observations from your own samples rather than filling the record with assumed values.
Talk to your label supplier about available trial constructions and minimum trial quantities. A cheaper roll that requires reapplication may be a poor purchase, but no cost saving can be calculated without actual reject, labor and material data. Explore Guanma’s self-adhesive film range, then send the container details and failure photographs to discuss sampling.
Frequently Asked Questions
These answers distinguish failure terminology from intentional flag labeling and address checks that may be missed during troubleshooting. The labels used in a trial should be representative of the completed construction. Keep the application environment and observation conditions with the sample record so a supplier can review it.
What is a flag label?
A flag label deliberately projects from an item, often for cable identification; unwanted edge lifting is a different use of “flagging.”
An intentional flag leaves a readable area extending beyond a cable or similar item. A flag applicator is designed for that arrangement. On a small bottle, this guide uses flagging to mean separation where the applied label was intended to stay attached. Include a photograph in an enquiry so the supplier knows whether you need projecting flag labels or help correcting an application defect.
Were your labels cut correctly?
Inspect the die-cut edge and liner before blaming the adhesive; converting faults can interfere with consistent dispensing and contact.
Ask the converter to check whether cutting has damaged the liner or left an edge that doesn’t release cleanly. Compare unused labels with samples taken at the point of application. A liner should support the intended feed process without tearing, but the appropriate construction depends on the equipment. If a defect repeats at the same position on the roll, retain that section and its batch identification. Don’t infer the cutting problem from the lifted bottle edge alone.
Are your labels moving around before they reach the label applicator?
If labels shift or lift before transfer, investigate roll handling, release behavior and feed setup before treating the defect as container adhesion failure.
Inspect the web path and the point where each label separates from its liner. Ask the equipment supplier to check the relevant settings rather than making several simultaneous adjustments. Labeling systems vary, so a setting copied from another machine isn’t a reliable baseline. Record whether the problem occurs during startup, at the intended operating condition or throughout the roll. Keep displaced labels for comparison with correctly fed ones. A label that arrives skewed may not contact the product’s container properly, even when an accurately placed hand sample holds well.
Will overlapping the label stop flagging?
Overlap may help some constructions, but it must be tested against the actual printed or coated face.
The bond at the overlap differs from the bond to the bottle. Changing wrap length also changes geometry. Keep the finish and overlap dimensions in the trial record; no universal overlap width follows from this guide.
How long should a small-container label trial run?
Agree the observation schedule with the supplier and buyer using the label construction, application conditions and intended service exposures.
An immediate check records application quality, while later observations reveal changes that weren’t initially visible. Neither establishes an adequate test duration by itself. In a 2021 OnlineLabels customer thread, peeling was reported after two weeks; that’s an individual observation, not a recommended trial period or evidence of a universal failure rate.
Supplier instructions sometimes describe time for label adhesive to set or develop adhesion. Ask what that means for the specified product and conditions rather than adopting a generic waiting time. Record each observation time, retain a control and check the strength of adhesion using the agreed method where appropriate. If the pack will be squeezed, exposed to moisture or moved through different temperatures, include representative conditions in the qualification plan. A room-temperature shelf observation can’t answer every service question.
Scope: This guide synthesizes publicly available standard summaries, technical publications, and labeled illustrative cases, which were reviewed in October 2026. The trial matrix and record are proposed working aids, not Guanma test results. Acceptance limits and regulated-use requirements must come from the applicable product specification and qualification plan.
References & Sources
- ASTM D3330/D3330M-04(2025) public scope and significance, including limits of peel comparisons.
- ASTM D6195-22 public loop-tack scope and backing effects.
- FINAT test methods public method index and performance-specification disclaimer.
- Fitzgerald et al., Synthetic Pressure Sensitive Adhesives for Biomedical Applications, 2023 general adhesion principles; application scope differs from bottle labels.
- Labels & Labeling, label application troubleshooting public technical guidance on interacting construction and application variables.
- McGuiggan and Filliben, NIST, 2006 public abstract of temperature-dependent peel measurement.